Modifying the Properties of Tasks at Runtime
From the Workflow Monitor you can modify some of the properties of the tasks included in it as long as they are active. Changes to task properties affect only the current execution of the Workflow.
This topic describes the properties you can modify. As regards the remaining ones, you can see but you cannot change them.
To Modify the Properties of a Task in an Active Schedule
-
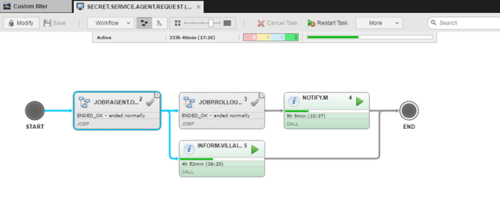
Right-click the Workflow task on the Tasks list and select Open Monitor.
The Workflow Monitor opens in read-only mode. For example:
-
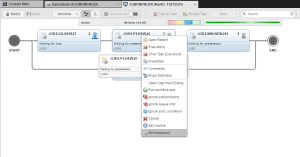
Select the task you want to modify.
You can only change the properties of tasks that are still running.
-
Click the Properties button also on the toolbar to open the pane at the bottom half of the window where you will make your changes.
The pane is divided in several tabs containing the task settings. These are still in read-only mode and therefore grayed out.
- Click the Modify button on the toolbar to activate the edit mode.
-
Change the task properties as follows:
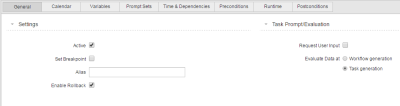
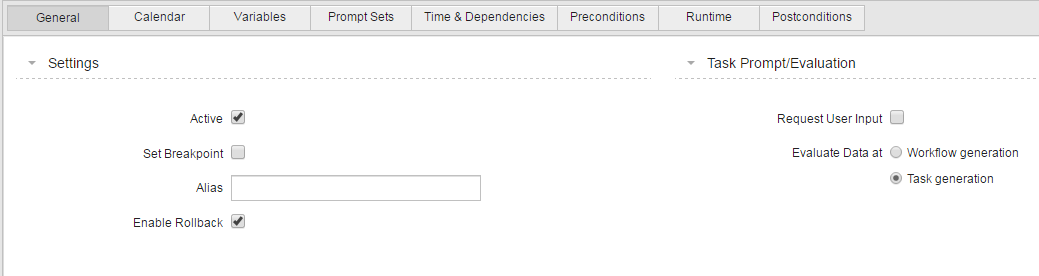
Settings Section
Option Description Active Here you can set a workflow task to active or inactive. The workflow task is skipped if this checkbox is deactivated.
Activating/deactivating a task here does only affect this particular execution of the Workflow. The next time the workflow is executed, this task will be active again. If you want to permanently deactivate a task, you have to do so on the General page in the corresponding object definition. See General Page.
Set Breakpoint If you activate this checkbox, the workflow stops at this task. The status of the workflow changes to Workflow is blocked. To continue processing it you must open the Workflow monitor and delete the breakpoint manually:
Alias The name that should be used to display the task within the workflow (similar to the title in the Explorer). The object name rules apply for the alias as well: it is limited to 200 characters; only the following characters are allowed: A-Z, 0-9, $, @, _, -, .
You can use the ALIAS_SPECIAL_CHARACTERS setting in the UC_CLIENT_SETTINGS variable to allow more characters in the alias name.
The object name is used if no alias is specified.
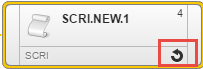
Enable Rollback This runs the rollback actions that are defined for the object. An icon on the task box indicates that this option is activated:
You can store rollback and backup actions for all executable objects that can be included in a workflow. By doing that, you can restore a certain condition if an error occurs.
The rollback settings are defined in the Rollback Page.
Task Prompt/Evaluation Section
Here you define how prompts are handled for the task.
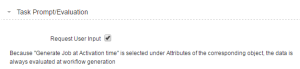
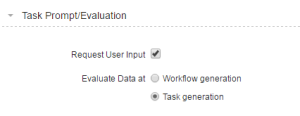
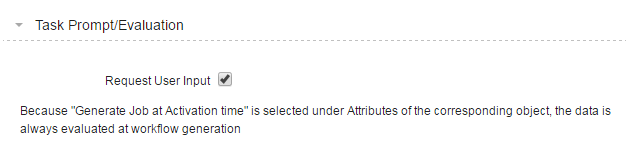
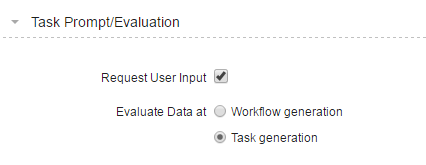
Option Description Request User Input By default, the prompt sets of workflow tasks are not displayed on screen and user interaction is not required while the workflow is being executed; the default values specified in the Prompts Tab. This is important to avoid unnecessary interruptions.
However, there can be situations in which you want to change this behavior.
Activate the Request User Input checkbox if you want the task prompt sets to be displayed on screen requesting the user to enter values.
Evaluate Data at Specify here the point in time on which the values entered in the task prompt sets are evaluated. This depends on the generation time that has been specified on the Attributes Pages of Executable Objects of the object definition.
-
If Generate Job at Activation Time has been selected, these values are evaluated at workflow generation.
- If Generate Job at Runtime has been selected you must specify here whether this should occur at
- Workflow generation, or at
- Task generation
Task prompt sets are displayed after the workflow prompt sets (if available) in the order in which the tasks are processed in the workflow.
When entering the required values, take into account that returning to already confirmed prompt set dialogs is not possible. Consider also that canceling a prompt set dialog cancels the complete workflow generation process.
Earliest Start Time
You may want certain tasks not to be executed before a specific point in time, regardless of the status of previous tasks in the workflow. For this purpose you assign them an earliest start time.

- Activate the Define Earliest Start Time checkbox if you want to use this function.
-
The real date of a workflow is determined when the workflow is generated.
You can define that the selected task is started either on the real date or specify a number of days after this date.
In Real Date + [n] day(s) leave 0 (default = the real date) or enter a number of days.
For example, the task depicted in the screenshot above can begin at 12:00 o'clock on the workflow's activation day. If it is activated later than that, it starts immediately provided all other preconditions are met
-
Enter the Time.
If the task is ready to start before this time, its status changes to Waiting for start time.
You can always start tasks manually from the Workflow Monitor, regardless of your definitions here.
- If necessary, select a Time Zone object .
For example, a workflow is activated on May 20. It contains a task in which Real Date + 1 day(s) at 15:00 has been specified as the earliest start time. This task will not start before May 21 at 15:00.
Time Checkpoint
The chronological execution of a workflow can be monitored with time checkpoints. Here you define them; they are the points in time in which you want the workflow execution to be evaluated. You can also define a different object to be executed if the task cannot be processed at the defined checkpoint.
Checkpoints become active when the workflow is activated. This is especially important if you use the Generate at Runtime option.

Dependencies
Here you define time and status conditions that determine what should happen with the task if they are met and specify alternative actions.

Field/Element Description Define Latest Start/End Time Activate this checkbox to define time dependencies:
- Latest Start time: If the task is not started by this time, it is not executed at all.
- Latest End time: As soon as a task starts, its estimated duration is calculated. If the calculated end time is after the time specified in this field, it is not executed anymore.
- Real Date + [n] day(s): The real date is determined when the top workflow is generated. You can define that the selected task is started either on the real date or you can specify that it is started a specific number of days later.
Possible values: 0 (default) to 99
- Time: The latest time the task should start/end on the day defined with the previous option. If the task could not be started/ended by this time, it is not executed at all.
Possible values: 00:00:00 to 23:59:59
- Time Zone: The time zone object applied to start the task.
If the task cannot be executed, its end status is set to
ENDED_TIMEOUT. If ELSE conditions are defined, they are applied.Run this task if Define which end statuses in the table of the predecessor tasks, which follows, are required for this task to be executed:
- all statuses match: The task is executed if all predecessors end with their specified statuses.
- at least one condition matches: The task is executed if at least one predecessor ends with its specified status.
Task table If there are predecessor tasks, they are listed in the table. For each predecessor task, you see the task name, type, agent, and status. The status can be edited. ELSE (on status mismatch or latest time failure) Define the action to take when none of the predecessor conditions are met:
- This Task:Skip, Block, Block and send abort signal to parent, or Abort
Define how the system should continue with this task. The related actions will be taken and the corresponding status set. - Action: Optionally, also run another task. If you activate this option, you can select the executable object that should run from the Execute dialog.
Select Override Runtime Settings to display further options.

Activate Monitor MRT and/or Monitor SRT if you want to monitor the maximum and/or the minimum runtime. The following calculation methods are available:
- Fixed value
Select this option to display the input fields in which you can enter a fixed duration.
- ERT + additional duration/ERT - additional duration
Select this option to add or subtract the ERT duration time and enter the correction time in %.
The value you enter here is added to (for max. duration) or subtracted from (for min. duration) the estimated run time
- Real date + additional duration (for the maximum runtime only)
You can define a particular time until which the task must be finished.
You can combine the following options:
- The number of days in the Additional Duration field
- A specific time in the Finish Time input fields
- A Time Zone object
Actions on Runtime Deviations section
If you define a maximum or minimum runtime, you must also define the action to be executed in case the runtime exceeds the maximum or falls below the minimum.
You can either cancel or quit, or you can specify another task.
-
- Save your changes.
- Click the Modify button again. This leaves the edit mode and allows you to activate the workflow again.
- Start the execution of the workflow again.


See also: